Why Factions Matter
Factions turn every Quasimorph contract into a campaign decision, not just another station raid. The side you help can gain territory, stronger equipment, and better trade inventory, while the side you hurt may become harder to raid or lose access you needed.
You do not need one permanent ally, but you should avoid accepting contracts purely because their displayed reward is large. A mission’s travel time, enemy gear, location, objective, and effect on future barter can matter much more than its payout.
The Stock Exchange is the best place to begin. It shows a faction’s Power, Technology, reputation, owned stations, current strategy, missions, and possible barter goods. Check it before committing a valuable operator or loadout.
| System | What it changes | Why a player should care |
|---|---|---|
| Power | Mission strength, loot quality, rewards, and automated mission success | High-Power factions can offer better returns but create more dangerous operations |
| Technology | Gear tiers and mission availability | Higher Technology expands the weapons, armor, and equipment available through barter |
| Reputation | Station access and barter options | Negative reputation can block landing and trading with that faction |
| Controlled stations | Ongoing Power and Technology growth | Territory shapes which groups become dominant over time |
Faction growth happens as time advances and missions resolve. Letting a useful ally hold stations can improve its long-term inventory, but an unchecked enemy can become an expensive problem. Think of this as managing the Solar System’s arms race.
Picking Allies and Enemies
Start by supporting a compact group of factions whose gear solves your present problems. Four or five trade relationships can work well once you know the game, but newer players often benefit from focusing on two or three reliable sources of armor, ammunition, supplies, and progression items.
The Hexarchy corporations are practical early partners because they tend to have broad access across the map. They also do not normally generate procedural missions against one another, so supporting one Hexarch does not automatically require you to destroy another.
| Faction | Useful identity | Good reason to work with them |
|---|---|---|
| AnCom | Broad plasma and electric equipment | Flexible generalist route with varied weapon options |
| SBN | Lasers, electromagnetic weapons, energy-resistant armor | Helpful against advanced energy-focused enemies |
| RealWare | Military armor, firearms, large backpacks | Strong all-around combat gear and hauling capacity |
| Dilthey | Shock, laser, and hypersonic equipment | Shock weapons can disrupt enemies; missions may yield implants |
| Daydream Chems | Poison weapons and chemical gear | Poison is effective against many enemies and useful for specialized builds |
| Franche-Comte PS | Practical weapons, logistics items, ammunition | Broad utility, maintenance supplies, and useful barter depth |
RealWare is a popular target for both friendship and theft. Supporting it can provide dependable armor and cargo capacity; fighting it can also produce valuable battlefield loot. Decide based on whether you need predictable trade access or are prepared to win against well-equipped personnel.
Minor factions are not automatically inferior. They are often the best answer to a narrow need: food, fuel, maps, poison resistance, a specific damage type, or a specialized backpack. Their missions may also be closer to your current position than a powerful corporation’s stations.
Avoid treating faction alignment as morality alone. Civil Resistance, pirates, corporations, and quasimorphic forces can all support different campaign routes. Choose based on the story you want, the equipment you need, and the risks your roster can handle.
Contracts, Reputation, and Barter
Every contract has a beneficiary and a victim. The beneficiary is the attacking side that creates the operation, while the station owner is the victim. Switch sides in the mission briefing when the defensive contract better serves your interests.
Supporting a station owner can provide friendly NPCs during the operation. They may distract or eliminate attackers, though their deaths can also leave loot behind. Your real goal should still be completing the objective and extracting safely.
| Mission type | Main objective | Strategic effect |
|---|---|---|
| Conquest | Clear enough occupants across every floor | The beneficiary takes control of the asset |
| Defend | Survive the required turns and remove attackers | The defender gains Power |
| Elimination | Kill a high-value target on the deepest floor | The victim loses Power |
| Espionage | Steal the objective item and extract | Beneficiary gains Technology; victim loses Technology |
| Sabotage | Destroy designated equipment on the deepest floor | Victim loses Technology |
Reputation controls the quality and availability of barter goods. Higher reputation unlocks more of a faction’s inventory, while Technology determines the tier of equipment that faction can produce or offer. A powerful faction with weak Technology may still be less useful than a smaller, technologically advanced specialist.
Do not casually attack a faction holding credit you intend to spend. Contract rewards can include items and faction-specific credit. If your reputation falls below zero and trade breaks down, that saved credit can become worthless.
Use barter to close an identified gap, such as a needed Magnum component, an operator chip, a reliable armor set, or ammunition for a weapon line you already use. Randomly accumulating trade value without a goal often delays more meaningful progress.
How to Choose a Contract
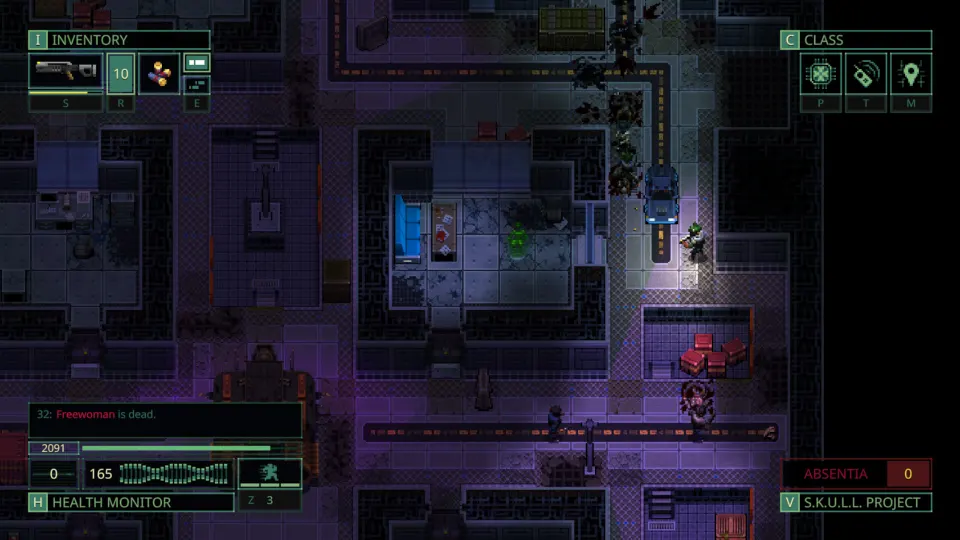
Read beyond the skull rating. Red skulls primarily reflect Power Concentration, the budget used to create enemy squads, but they do not fully describe the threat. Enemy faction, Technology, damage types, floor count, station type, and Quasimorphosis can make a low-skull mission much deadlier than it appears.
Before launching, compare contracts with this short checklist:
- Pick a clear purpose: faction reputation, a specific component, a story objective, or supply recovery.
- Check the enemy’s likely damage types and bring armor or medicine that answers them.
- Prefer short travel and fewer floors when rebuilding after a loss.
- Consider facility type when hunting materials; laboratories, mines, prisons, farms, civilian sites, and military facilities do not offer the same containers or machinery.
- Keep backpack space for objective items, chips, prototypes, and permanent progression.
- Leave after securing the purpose of the run unless optional rooms justify the added danger.
| Situation | Better contract priority |
|---|---|
| You need dependable armor and capacity | RealWare support or raids you can safely win |
| You lack ammunition and general supplies | AnCom, Franche-Comte PS, or a nearby practical trade route |
| Energy weapons are causing losses | SBN equipment and beam-resistant armor |
| You need an early damage advantage | Daydream Chems poison gear |
| You need map knowledge on long runs | Data-miner access from appropriate faction inventories |
| Your roster is injured or under-equipped | Short local missions with simple objectives and safe extraction paths |
A high reward can be misleading if it requires a weak operator to cross several floors against a faction whose damage type you cannot resist. Conversely, a modest mission may be ideal when it upgrades an ally’s Technology, provides a needed chip, or rebuilds medicine and ammunition.
Quasimorphosis changes this calculation further. On high-Power missions, it can add dangerous interdimensional enemies and make extended exploration harder to justify. If your objective is complete and your Q meter is becoming a liability, extract rather than turning a successful contract into an avoidable loss.
FAQ
What is the best quasimorph faction guide strategy for beginners?
Build relationships around immediate needs instead of trying to support everyone. A practical starting approach is one broad Hexarchy partner, one faction that supplies a damage type or resistance you need, and short contracts that improve your Magnum or stabilize supplies.
Should I stay neutral between all factions?
You can, but complete neutrality gives up much of the value of reputation and faction-specific barter. You do not need permanent loyalty, yet repeatedly attacking factions whose stations and gear you need will restrict your options.
Is Power or Technology more important?
They serve different purposes. Power affects mission scale, rewards, loot quality, and automated success, while Technology governs equipment availability and the number of missions a faction can issue. For trade planning, Technology is usually the more direct priority; for mission danger, watch Power Concentration and enemy equipment.
Which faction should I avoid fighting?
Avoid fighting any faction whose stations, stored credit, or gear you currently depend on. Also avoid damage profiles your equipment cannot handle. A faction is not inherently safe or unsafe: your armor, ammunition, mission purpose, and extraction plan decide whether the contract is worth taking.