Read the Contract Before You Accept
A contract is never just a payout in Quasimorph. It decides where the Magnum travels, who becomes stronger, what enemies you face, and whether your extraction haul solves a real problem. New players who choose by reward alone often spend more supplies reaching a mission than they gain from finishing it.
Read the entire briefing before selecting a side. A contract normally presents a Beneficiary, who wants the operation completed, and a Victim, who loses influence, assets, or personnel. Switching sides can change the mission type, allies inside the facility, reputation effects, and the political result.
Use this reading order every time:
- Check the Beneficiary and Victim.
- Read the objective and extraction requirement.
- Compare remaining time with travel duration.
- Look at difficulty, floors, and Power Concentration together.
- Identify the station type and likely loot.
- Confirm your operator and loadout can handle the actual mission.
- Compare the listed reward last.
| Contract detail | Why it matters | Beginner decision |
|---|---|---|
| Beneficiary | Gains power, technology, or access from success | Favor factions whose trade goods or story route you need |
| Victim | Loses position and may become hostile to your plans | Avoid harming a faction where you hold valuable credit |
| Objective | Determines what must be done before extraction | Skip missions whose completion condition you cannot explain |
| Floors | Extends combat, hunger, injuries, and elevator searches | Prefer shorter missions until your supplies are stable |
| Time remaining | Limits whether travel is practical | Keep a comfortable buffer after arriving |
| Reward | Pays items and possibly faction-specific credit | Treat it as a tiebreaker, not the main reason to deploy |
The mission label alone is not enough. Espionage, sabotage, elimination, defense, and other jobs can ask for very different actions on the highest floor. For example, an espionage job may require carrying an objective item out, which means leaving inventory space free. An elimination mission can demand a difficult final fight even if earlier floors go smoothly.
Before departure, say the win condition to yourself in plain language: “I need to reach the top floor, take the item, and extract with it.” If that sentence is unclear, do not risk a good operator while learning the mission.
Choose a Side With a Campaign Goal
Faction choices shape the solar system over time. You do not need to be loyal to everyone, but you should know why you are helping a specific side. Reputation, trading access, station ownership, faction technology, and available contracts can all make one result more useful than another.
Credit is tied to the faction that grants it. Contract rewards are largely delivered as items; any remaining value may become credit with that faction. That credit is useful only at its stations. If you turn a faction hostile while holding its credit, a trade break can cost you access to that stored value.
| Goal | Favor contracts for | Avoid contracts against |
|---|---|---|
| Buy a faction’s equipment or tech | The faction that sells the items you want | That same faction, especially if you hold credit |
| Find a missing Magnum upgrade material | Owners of relevant facility types | Nearby factions controlling useful production |
| Follow a chosen story route | The relevant narrative faction | The side that blocks the route |
| Keep local work available | Factions near the Magnum | Actions that empty your preferred area of useful contracts |
| Maintain a varied system | Weaker or useful minor factions when appropriate | Repeatedly empowering only one dominant bloc |
A focused approach is easier for a new campaign. Pick one or two factions whose equipment, technology, or story direction interests you, then take favorable local work for them when it is sensible. That does not mean accepting every offer. A poor mission remains poor even when the employer is useful.
Faction balance also matters. Large factions do not necessarily create conflicts against every other large faction, so blindly strengthening one group can reduce the variety of future opportunities. Supporting smaller factions occasionally can preserve trade options and contract variety. Think of it as keeping a market alive rather than trying to make every group happy.
Changing sides can be worthwhile when defending the station owner gives you friendly NPCs inside. They can distract attackers, remove threats, and leave equipment behind if they fall. Friendly fire is still possible, so do not assume every ally is harmless to your plans.
Do not accept a political cost for a routine payout. Take the contract when it advances a concrete need: a desired item pool, a ship component, a deliberate story choice, or reliable trade access. If neither side helps your current plan, waiting for a better contract is often the smart play.
Judge Risk, Travel, and Loot Together
Red skulls are only a partial warning. They influence Power Concentration, but real danger also comes from the enemy faction, its technology, its weapons and damage types, Quasimorphosis, floor count, and your own preparation. A low-skull mission against a technologically advanced enemy can be deadlier than a higher-skull mission against an opponent you understand.
Power Concentration is best read as a rough budget for enemy forces on each floor, not as a guarantee of an easy or hard run. Compare it with the other information on the card. More floors mean more chances to run low on calories, ammunition, medicine, durability, and inventory space.
| Signal | What it can increase | What to do before accepting |
|---|---|---|
| More floors | Supply use, injuries, time spent searching | Pack enough food, ammo, medicine, and extraction space |
| High-tech faction | Elite enemies, better armor, unfamiliar damage | Inspect enemy resistances and bring suitable weapons |
| High Power Concentration | Larger or stronger enemy squads | Bring a tested loadout, not experimental gear |
| Quasimorphosis | Additional pressure and dangerous Quasimorphs | Carry tools and medicine you know how to use |
| Long travel | Expiring contracts and lost local opportunities | Travel only when several benefits justify the trip |
| Specific station type | Different containers and fabrication loot | Target sites that can produce your needed materials |
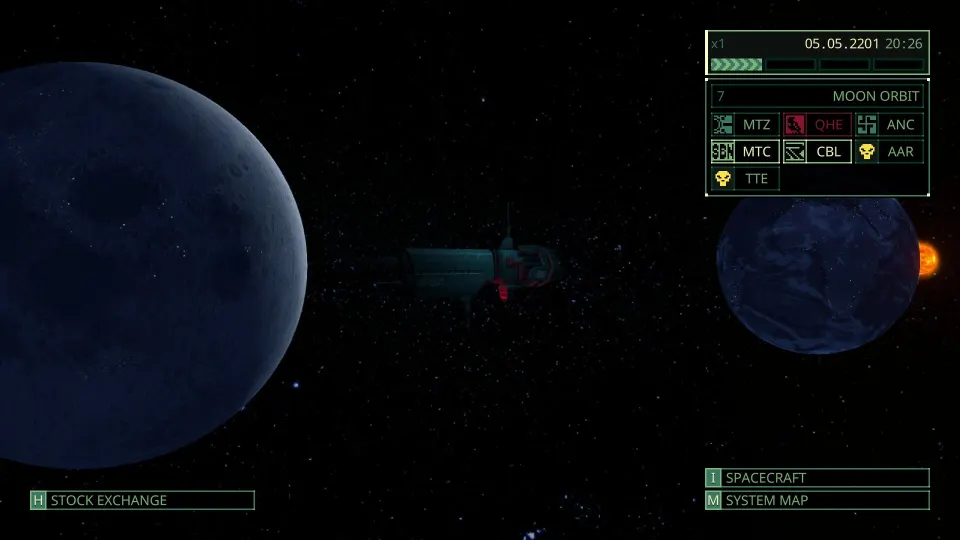
Travel is a campaign decision, not a loading screen. Open the System Map and check the complete travel duration before committing. Leave time for recovery, changing equipment, and a mistake. If the trip consumes most of the contract window, you may arrive unable to adapt to a bad loadout or an injured operator.
Stay close to the Magnum early on. Nearby, manageable contracts build ammunition, medical supplies, cargo, faction credit, and experience without sacrificing weeks to transit. Make a long journey only when it offers something local work cannot provide:
- A story step you deliberately want to pursue.
- Multiple worthwhile contracts around the destination.
- A needed component or facility type unavailable nearby.
- A faction relationship you are actively developing.
- An operator and kit already ready for deployment.
Station type should influence your choice because it affects the containers, fabricators, and loot that may appear. A mission with a smaller completion reward can be the better run if its location has a realistic chance of yielding the industrial, medical, weapon, or armor resources blocking your next upgrade.
Bring a loadout that can complete the objective without depending on lucky finds. Match the operator’s class and talents to the weapon and ammunition you have. Carry food, water, healing, and a modest ammunition reserve, but do not overload yourself with every spare item. Excess weight can reduce dodge and makes a supposedly safe mission less forgiving.
Finally, protect your extraction margin. Once the objective is complete, optional looting must compete with your remaining health, calories, ammunition, Quasimorphosis, and inventory durability. A successful extraction with fewer items is usually more valuable than losing an excellent haul while searching one more room.
FAQ
What is the best first contract in Quasimorph 1.0?
For a new player, choose a nearby contract with a manageable objective, few floors, enough time remaining, and consequences you understand. A lower reward is acceptable if it lets you learn the mission safely and return with replaceable gear intact.
Should I always choose the highest reward?
No. Higher rewards can reflect longer travel, extra floors, stronger enemy forces, or a faction decision that harms your future trading plans. Compare the reward only after checking the side, objective, route, risk, and station type.
Are red skulls an accurate difficulty rating?
Not by themselves. Skull rating is connected to Power Concentration, but faction technology, enemy equipment, resistances, Quasimorphosis, floor count, and your loadout can matter more. Treat skulls as one clue, not the verdict.
Which factions should beginners support?
Support factions whose equipment, technology, contracts, or story direction serve your campaign. Keeping one or two preferred trade relationships is simpler than trying to please everyone, but avoid destroying useful local options for a minor reward.
How should I use this quasimorph 1.0 | new player guide: choosing contracts?
Use it as a pre-deployment checklist. Pick a side with purpose, verify the mission objective, calculate travel time, assess real danger, target useful station loot, and extract once your safety margin starts disappearing.